
A few weeks ago, I saw Patrick McKenzie (@patio11) mention livegrep as an essential developer productivity tool:
Since it's publicly available, let me mention that the most common tool I use for answering these questions is livegrep and that I intend to boot up a livegrep instance on the first day of every startup for the rest of my life.
— Patrick McKenzie (@patio11) January 18, 2019
It borders on miraculous.https://t.co/9CWxD10PZe
I had never heard of livegrep before, so I checked it out. It's pretty amazing -- sub-second code search across large codebases in an easy-to-use web interface.
The creator of livegrep, @nelhage, has a demo livegrep instance with the Linux repository indexed. Even with a pretty large codebase -- nearly 2.5 GB -- the performance is outstanding.
I spent a fair bit of time reviewing the codebase and getting it to build with my repositories. This post is a breakdown of what I learned.
In this post, we'll cover:
- What is livegrep?
- What are the elements of livegrep?
- How to set up your own livegrep instance
- How to use livegrep
Let's jump in.
What is livegrep?
Livegrep is a tool for fast, web-based regex search over large code repositories. It was created by Nelson Elhage and it's clear, based on the issues and pull requests, that it is in use at Stripe and Dropbox.
The algorithms and process behind Livegrep are fascinating. I won't be able to do them justice -- you should read Nelson's summary of how livegrep works here.
Think about the complexity involved -- Livegrep is doing full Regular Expression searches over a multi-GB dataset with sub-100 millisecond latency.
A couple cool notes from Elhage's post:
Livegrep uses a suffix array to index all substrings within a corpus.
When searching the suffix array, Livegrep will combine a few strategies to narrow down the matches in the corpus. This includes range searches (e.g. if your regex starts with something like [a-f]) and chained searches (for narrowing down a regular expression that has a common prefix).
Once the initial matches are found, it uses a regex library called RE2 (written by Russ Cox) to search for items that truly match the query. The results are then returned to the user.
Again, there's some really cool algorithms work described in that post, and you should check it out.
If you enjoy that, you may also enjoy Russ Cox's paper on how Google Code Search Worked, as it has similar principles.
Now that we know what Livegrep is and how it works, let's review the core elements of running our own Livegrep instance.
What are the elements of livegrep?
There are two core elements of livegrep:
- codesearch: A C++ program that indexes and searches your repository data. You interface with codesearch by sending search requests via GRPC and receiving the results.
- livegrep: A web server that serves up the static files for the web interface and proxies API requests to the codesearch GRPC backend.
The general flow looks something like this:

- The user hits the livegrep web instance at
/search, which displays the livegrep UI. - The user enters their query into the interface. The query is sent to
/api/v1/search/with some query parameters to indicate the user's query and settings. - The livegrep backend handles the API requests and makes a GRPC call to the codesearch server with the assembled parameters.
- The codesearch server performs the search against its corpus and returns the search results.
- The livegrep backend responds to the API request and the results are displayed in the browser.
It's pretty impressive how quickly livegrep is able to return searches, given there are two network calls and a corpus search that happens.
In addition to the two main elements of livegrep, there are also some additional tools for making it easier to assemble your corpus or regenerate your index.
One of these tools is the livegrep-github-reindex command that we'll use in the next section. You can use it to retrieve and index all GitHub repositories for a particular user or organization. It's a great way to bootstrap the configuration for your livegrep instance.
With these basic elements and tools in mind, let's get started with our own livegrep instance.
How to set up your own livegrep instance
In this section, you will learn how to set up your own livegrep instance. You'll be able to have a publicly-accessible web interface with your code repositories in about 15 minutes.
We will be using Docker for building our deployment artifacts and AWS Fargate for running our containers. If you want to follow along, please make sure you have:
- Docker installed;
- The AWS Fargate CLI installed; and
- AWS credentials configured in your terminal
Building the livegrep dependencies for a specific machine can be tricky, so we'll use Docker to help in the process.
Before we start, clone the deploy-livegrep GitHub repository with the following command:
git clone https://github.com/alexdebrie/deploy-livegrep
cd deploy-livegrep
Build your index
The first thing we'll do is build an index using codesearch. We will use the livegrep-github-reindex tool mentioned above to quickly grab our needed repositories.
To build an index of your GitHub repositories, run the following command:
cd codesearch
export GITHUB_USER=<your GitHub username>
make build-index
This will use the existing livegrep-base Docker image to run the livegrep-github-reindex command using your GitHub username. It will build the index and leave it on your machine at livegrep.idx.
Once the command exits, check to make sure your index file exists by running the following command:
$ ls -alh
total 60080
drwxr-xr-x  5 alexdebrie  staff   160B Jan 28 06:12 .
drwxr-xr-x  6 alexdebrie  staff   192B Jan 26 13:15 ..
-rw-r--r--  1 alexdebrie  staff   154B Jan 28 06:01 Dockerfile
-rw-r--r--  1 alexdebrie  staff   262B Jan 28 06:01 Makefile
-rw-r--r--  1 alexdebrie  staff   644M Jan 28 06:12 livegrep.idx
There should be a livegrep.idx file. You can see mine is 644MB.
Run your codesearch server
Our second step is to build a codesearch image with our index and get it running on AWS Fargate. This is made easier with the Fargate CLI tool.
With the Fargate CLI installed, run the following command:
fargate task run codesearch
This will do a few things:
- Build an image locally using the
Dockerfilein the directory. - Push that image to AWS ECR, a hosted container registry provided by AWS.
- Run an instance of the container image on AWS Fargate.
You can check that your codesearch instance is running with the Fargate CLI's ps command:
$ fargate task ps codesearch
ID                  IMAGE                               STATUS  RUNNING IP      CPU MEMORY
39b35267-cfe8-4938-b011-1e8ff17d48c8    955617200811.dkr.ecr.us-east-1.amazonaws.com/codesearch:483381e Running 19m40s  18.206.149.90   256 512
Run your livegrep server
The last step is to run your Livegrep server to host the web UI.
First, change into the livegrep directory:
cd ../livegrep/
Then, run the following command to get the IP address of your codesearch instance:
BACKEND_ADDR=$(fargate task ps codesearch | tail -n1 | cut -f 5)
We need to pass this in when starting our Livegrep instance so that it knows where the Codesearch GRPC server is located.
Finally, run a Fargate task with your Livegrep server:
fargate task run livegrep --env "BACKEND_ADDR=${BACKEND_ADDR}:9999"
Like with the codesearch task, this will build and push a Docker image, then run a container task using this image.
It might take a few seconds to start it up. You can check when it's running with the following command:
$ fargate task ps livegrep
ID                  IMAGE                           STATUS  RUNNING IP      CPU MEMORY
0eae1e18-18ca-43b2-8ada-4ad7fd427d70    955617200811.dkr.ecr.us-east-1.amazonaws.com/livegrep:483381e   Running 2m40s   54.173.100.73   256 512
Once your task is Running, use the following command to open your instance in your web browser:
open http://$(fargate task ps livegrep | tail -n1 | cut -f5):8910
If it works, you can type in your first query!
Awesome! You're up and running.
Caveats
The steps above are a quick way to get started, but it's not necessarily the best way.
In particular, this livegrep instance is publicly available and has no authentication. If you are showing private repositories with secrets, you should have better security here. The easiest way to do this is to use security groups with your Fargate task to limit access to certain IPs, such as people using your company VPN.
How to use livegrep
Now that you have Livegrep running, here are a few pro tips to help your searches.
Limit the repos you're searching against.
You can choose specific repos to search if you know the general place you're looking. You can do this by using the repo selector on the right-hand side of the screen:

Or you can use the
repo:<repo-name>term in your query to limit your search:
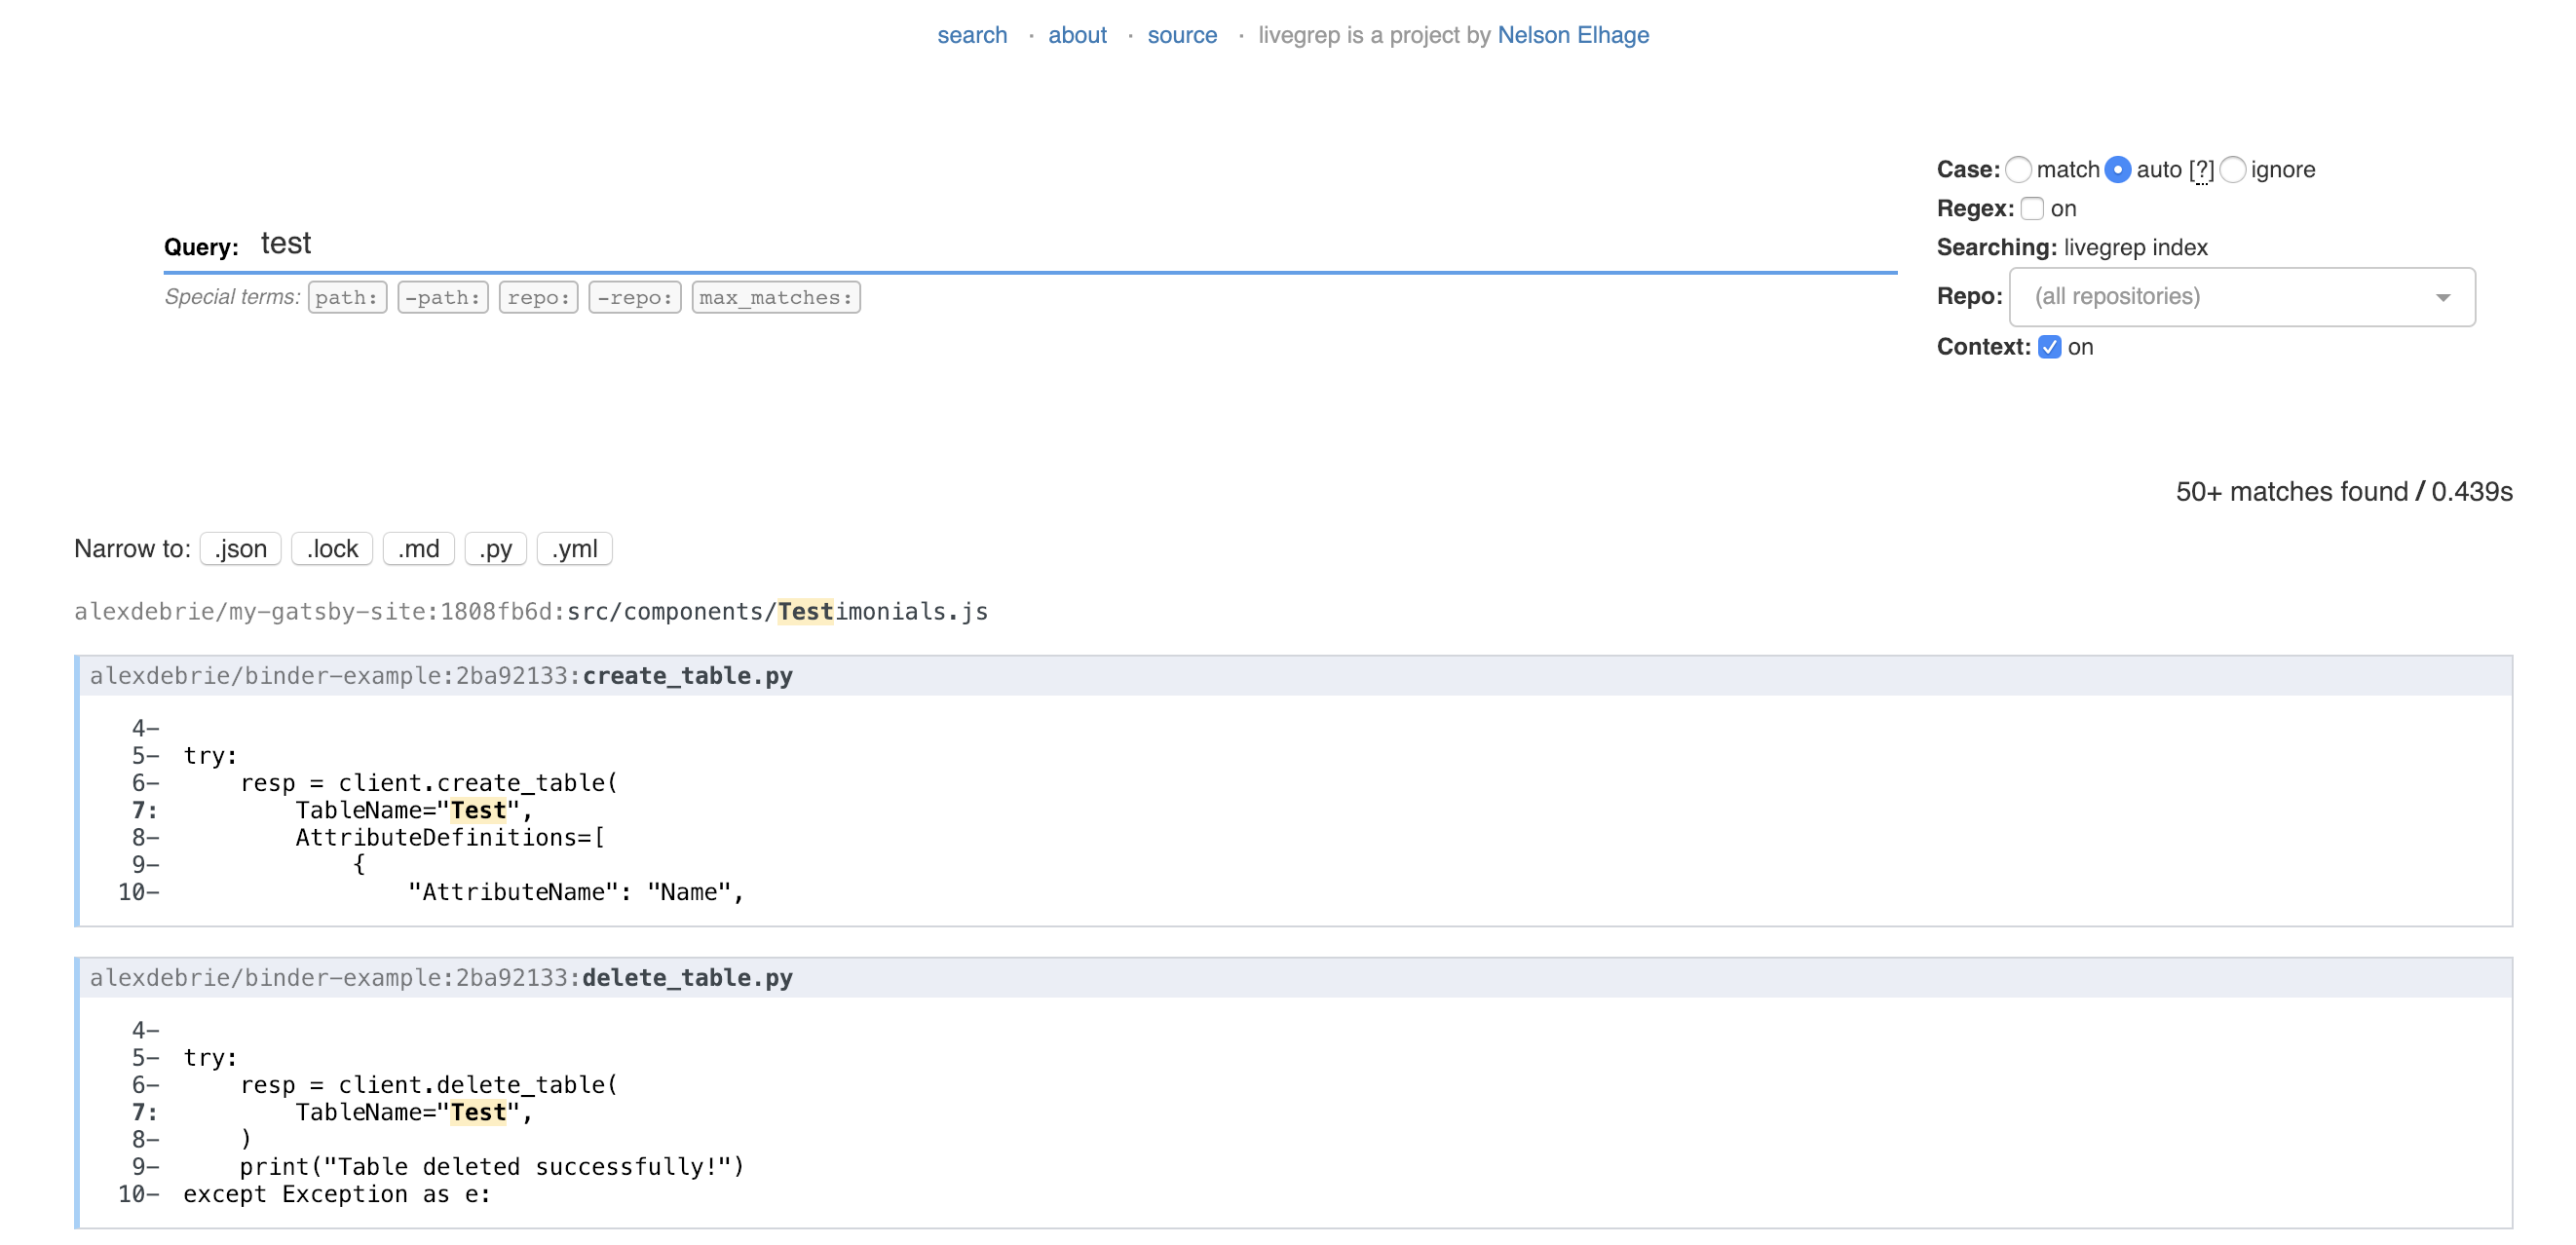
Limit your search to specific file types.
At times, you may have popular terms that are duplicated in JSON files, READMEs, or elsewhere. You can limit to specific file types by indicating the suffix you want.
The Livegrep UI provides some helpers to make this easier. For example, in the query below, I have both Markdown (
.md) and Python (.py) files that match my results.
If I just want
.py, I can click on the helper button to narrow my search:
Use the
-path:term to filter out unneeded paths.Often you'll want to exclude entire sections of repositories, such as anything in a
/docsor/testsdirectory.You can do that with the
-pathterm. It will exclude anything that matches its path.Learn Regular Expressions
Remember that Codesearch can do searches based on regular expressions. This is a very powerful tool.
Regular expressions can be tough to learn, but it's completely worth it to supercharge your code search game.
Bonus tip: The Livegrep UI works nicely with GitHub. You can click on a search result, and it will bounce you directly to the file and line in GitHub where that code exists. Check it out below.

Nice!
Conclusion
In this post, we learned how to set up and use Livegrep for blazing fast code search. We also saw some of the technical background behind the codesearch program powering the indexing and serving of repository data.
Livegrep is a cool tool, and I'm excited to see more development of it. In particular, I think it'd be great if it could integrate authentication, so we wouldn't have to worry about locking it down to specific IP addresses. Further, it'd be nice to see IDE integrations as well as support for other VCS providers like GitLab or Bitbucket.